0%

This page is planned to explain some terms about web-dev, from programming language, dev-software, dev-framework to data-base.

  1. JDK是甲骨文公司提供的JAVA开发工具包,包括
  • 类库
  • JVM虚拟机:JAVA程序在编译后在虚拟机中运行
  • 开发工具:编译器javac,运行工具java,
  1. JRE是JAVA的运行环境,包括
  • 类库
  • JVM
  • 运行工具
  1. API帮助文档:甲骨文官方貌似最新只到8.0
  2. IDEA:一个JAVA的集成开发环境,貌似市场占有率比Eclipse高很多
  • 项目的结构关系依次是:project–module–package–class,每一个class都可以有自己的main函数
  • 快速创建主函数:psvm
  • 快速创建println函数:sout
  • 自动导入package:settings->editor->general->auto import->xxxx imports to the fly
  • 代码提示忽略大小写:settings->editor->general->code completion->Match case
  • 格式化代码:ctrl+alt+L
  • 自动抽取方法:ctrl+alt+M
  • 建立100次的for循环:200.fori
  1. MySQL:一个数据库管理系统,其他类似的还有。。。如果下载的是解压缩版,需要配置环境变量。
  • 由于mysql server启动后是在终端输入命令,可以安装navicat的图形化软件(收费)
  1. JDBC:是利用JAVA操作数据库的API,定义了操作数据库的接口。而诸如mysql这样的数据库软件实现了这些接口并把这些实现打包成驱动(也就是jar包)基础流程包括
  • 在IDEA的项目中导入jar包,注册驱动,连接数据库,定义SQL语句,获取数据库对象,执行语句,释放数据库对象,释放数据库系统
  1. Maven:用于构建和管理JAVA项目的工具,IDEA已经集成了。目的是让JAVA项目能在不同的IDE中运行。
  • 坐标:用于标识jar包和当前项目,包括groupId,artifactId,version
  1. MyBatis:在开发持久性框架中,可以简化JDBC的开发
  • 如果想在Maven中使用,可以在pom.xml中添加坐标
  1. TomCat:服务器软件,相当于是把用JAVA手写的建立服务器等对HTTP协议操作的代码给封装了
  • 由于我下载的是解压缩版,需要配置环境变量,包括变量名CATALINA_HOME(TomCat根目录),JAVA_HOME(JDK的跟目录),JRE_HOME
  • 如果日志有乱码,修改conf\logging.properties的java.util.logging.ConsoleHandler.encoding = GBK(原本是UTF-8)
  • 自己做的项目放到\webapps目录下
  • 可以在IDEA项目中添加然后启动
  1. JSP:一种动态网页技术,.jsp中可以写html也可以写java代码
  • 应用场景:一个有登录功能的网页,用户登录后网页显示用户名
  • 比Servlet使用更简单
  1. MVC:一种软件架构,可以解决jsp代码混乱的问题
  • Model:我理解就是数据模型,一个类然后里面有成员和set/get方法,比如JavaBean
  • View:用户可以看到的部分,比如html jsp
  • Controller:用于处理事件并做出响应,比如servlet
  1. Vue:用于简化javascript中DOM操作的前端框架
  2. SpringBoot:
  3. Rest:访问资源的风格,
  4. IoC(infrastructure as code):
  5. EC2(Elastic Compute Cloud 弹性云计算)/RDS(Relational Database Service 云数据库)
  • RDS可以简化在云中设置、运营和扩展数据库的过程。兼容MySQL等引擎。
  • RDSはクラウド内でデータベースのセットアップ、運用、およびスケールを簡単に行うことのできるサービスです。MySQL,SQL Serverなどのエンジンをサポートしています。
  • EC2让用户可以租用云端电脑运行所需应用的系统,用户将可以在这个虚拟机上运行任何自己想要的软件或应用程序。

Record some tips in the video

  1. when play demo in the editor, we should click the play button and reclick the viewport to get into the game. If in the Editor Preferences -> Level Editor -> Play -> CHECK the Game Gets Mouse Control OPTION. We dont need to reclick mouse.
  2. Instead of change default loading map, get into the Editor Preference -> Loading & Saving -> CHECK Load Level at Startup TO Last Opened. This will help you when debuging cpp src and reopen the UE editor, load the test level instead default level.

When talking about story advantage game, Inventory system is simple, because there arent so many items to use or craft. While in RPG game, inventory system should be designed carefully. There are some features which I could imagine.

  • Pick up items. (food, wood, guns, bullet, quest items)
  • Use items. (food heal health, wood build house)
  • Drop items.
  • Craft items. (like minecraft)

As for the design of the UI, minecraft, PUBG, and Resident Evil are the typical typies.

I have searched several inventory system examples, and make a summary in this page.

  1. A simple inventory can use items written in cpp

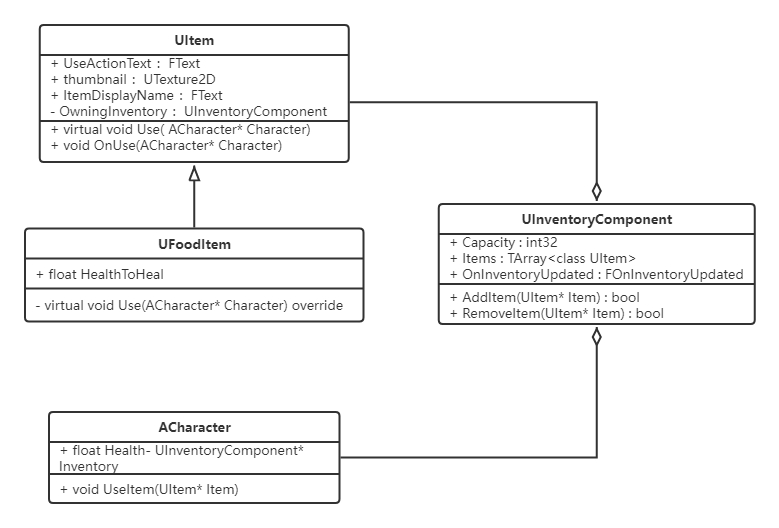
    I think the system could be improved, such as change the OnUse function from Items Class to InventoryComponent.

  2. Inventory System realize the minecraft function.

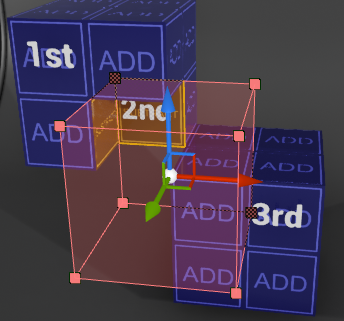
​ This a free template which could be found in marketplace, called Inventory System. I think this system is inspired by minecraft, because the item can be picked up when player close to the item. It also has a hotbar which player can use items like eating apples. Crafting function and simple chest are also in the template. Oh, and the item can be dropped down just like minecraft cube rotating automatically. The system is almost complete.

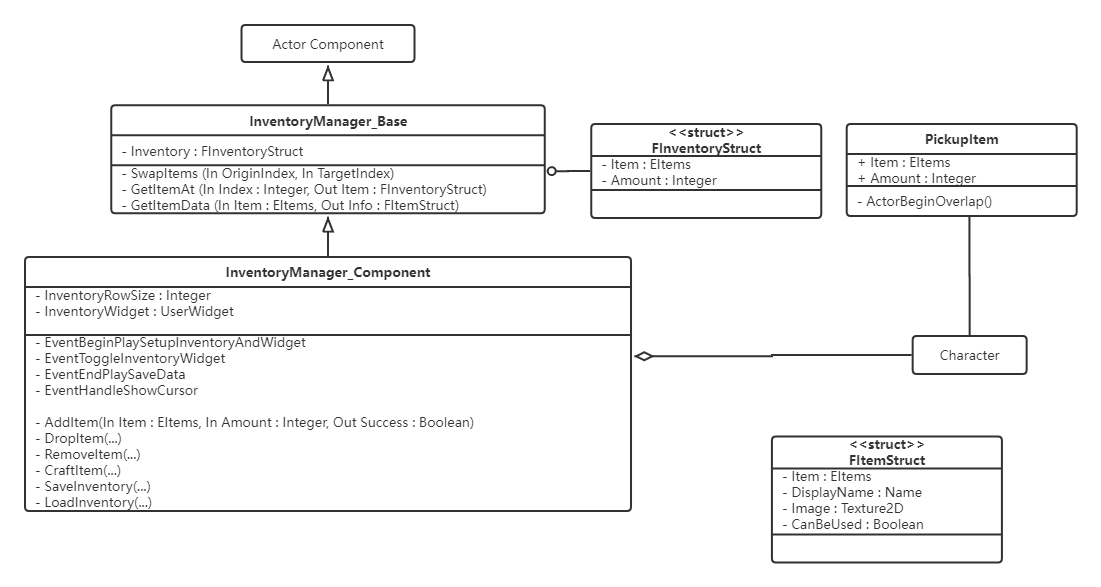
Items are create in struct, inventory component controls the save/load of items, initial of user widget, operator function of items.

However, I found there are issues when the inventory is initialized.

The For detailed explanation, please see the video I recorded. An improvement to the minecraft-like inventory system in UE4

The solution will be update soon.

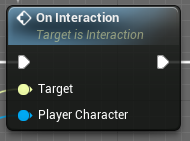
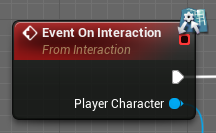
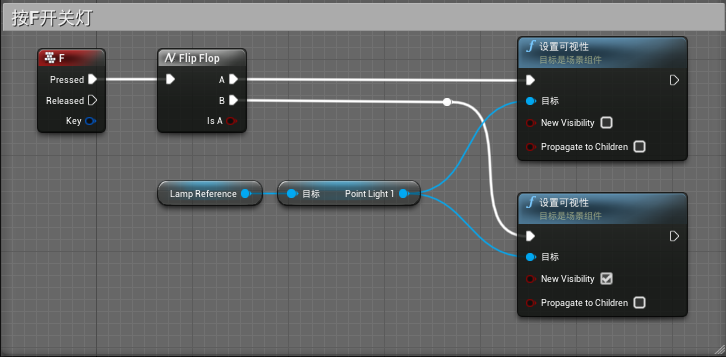
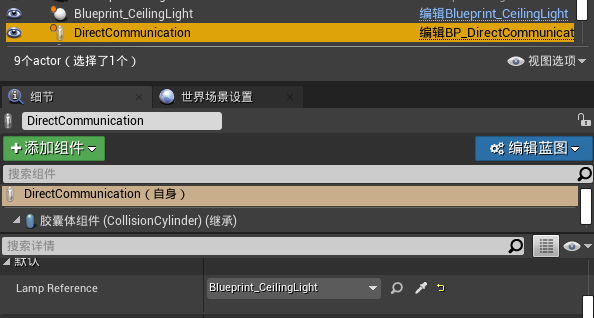
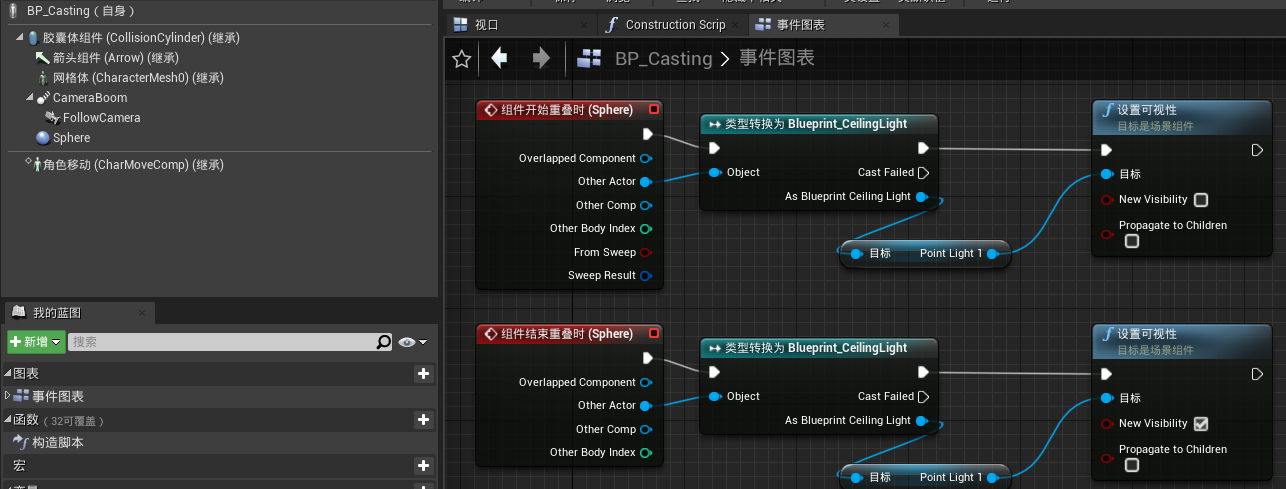
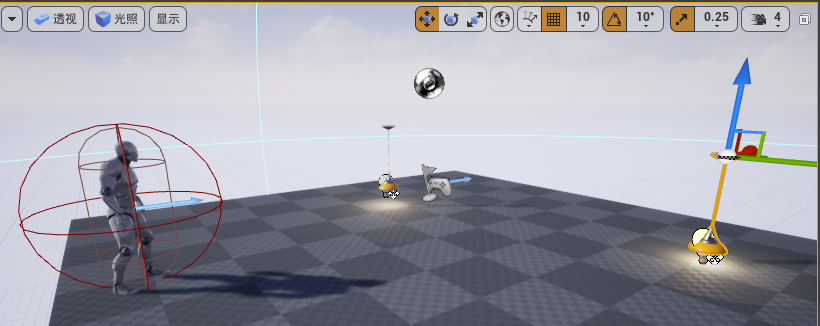
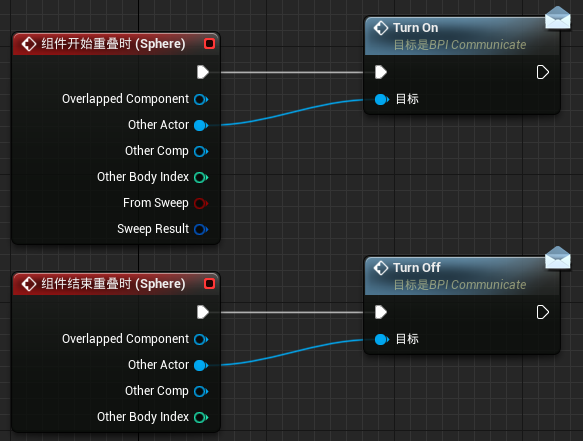
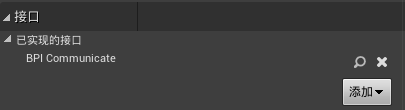
I still remember when I began to learn blueprint from the official document, actor communication can be realized by interface, cast-to or event dispatchers. According to the example, it will happen when player goes into a collision trigger, make the on actor begin overlap event in the blueprint to communicate with the player.

However, in the cpp version, the event dispatchers is explained as the delegate. At that time, I didnt realize the example as there are too many parameters in the bind event. Now I found an use case with delegate which is also the unreal FPS project template. The delegate is used for the projectile. When the projectile hits other actors, it calls the custom event OnHit() . Lets take a look at the projectile source code.
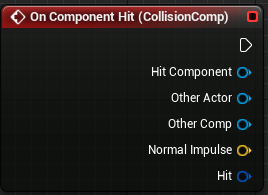
1
2
3
4
5
6
7
8
9
10
11
12
13
14
15
16
17
18
19
20
21
22
23
24
class AProjectile:public AActor
{
UPROPERTY()
USphereComponent* CollisionComp; //U indicate this is a collision component rather than a mesh

UFUNCTION()
void OnHit(UPrimitiveComponent* HitComp, AActor* OtherActor, UPrimitiveComponent* OtherComp, FVector NormalImpulse, const FHitResult& Hit);

}

AProjectile::AProjectile()
{
CollisionComp->OnComponentHit.AddDynamic(this, &AFPSCPPProjectile::OnHit); //seems like an event calls the custom function in the blueprint
}

//not all the parameters are used, but the "other actor" and "other component" are the things that the projectile is hitting. If it has the physics feature, add an impulse depend on the projectile. the code is similiar to the blueprint event.
void AProjectile::OnHit(UPrimitiveComponent* HitComp, AActor* OtherActor, UPrimitiveComponent* OtherComp, FVector NormalImpulse, const FHitResult& Hit)
{
if ((OtherActor != nullptr) && (OtherActor != this) && (OtherComp != nullptr) && OtherComp->IsSimulatingPhysics())
{
OtherComp->AddImpulseAtLocation(GetVelocity() * 100.0f, GetActorLocation());
Destroy();
}
}

Get into the engine source code.

The reason why USphereComponent reference can point to the OnComponentHit is that OnComponentHit is a signature of UPrimitiveComponent , its also considered as a delegate name.

1
2
3
4
5
6
7
8
9
10
11
//PrimitiveComponent.h

UCLASS()
class ENGINE_API UPrimitiveComponent : public USceneComponent, public INavRelevantInterface
{
UPROPERTY(BlueprintAssignable, Category="Collision")
FComponentHitSignature OnComponentHit; //considered as an event which can be created in blueprint in the same name
}

//long marco declaretion include parameters
DECLARE_DYNAMIC_MULTICAST_SPARSE_DELEGATE_FiveParams( FComponentHitSignature, UPrimitiveComponent, OnComponentHit, UPrimitiveComponent*, HitComponent, AActor*, OtherActor, UPrimitiveComponent*, OtherComp, FVector, NormalImpulse, const FHitResult&, Hit );

How to bind a function to the delegate

1
2
3
//Delegate.h
#define AddDynamic( UserObject, FuncName )
//OnComponentHit.AddDynamic(this, &AFPSCPPProjectile::OnHit) on the top

How to confirm the parameter in the custom function.

1
2
3
4
//SparseDelegate.h
//as we can see, in the projectile example, there are five parameters
#define DECLARE_DYNAMIC_MULTICAST_SPARSE_DELEGATE_FiveParams( SparseDelegateClass, OwningClass, DelegateName, Param1Type, Param1Name, Param2Type, Param2Name, Param3Type, Param3Name, Param4Type, Param4Name, Param5Type, Param5Name )

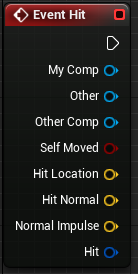
By the way, in the FPS blueprint template, event Hit is used to add impluse. The target of Hit is actor itself.

While in the cpp version, OnComponentHit is used which target is sphere collision. And it is actually including 5 parameters as we saw in the source code.

Above all is the summary of the projectile example.

Go back to the actor communication example.

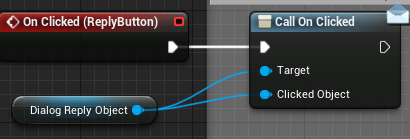
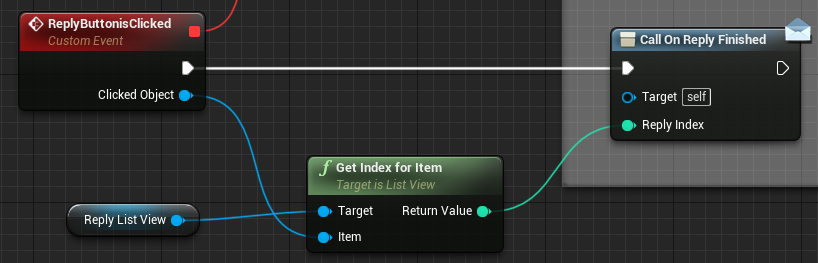
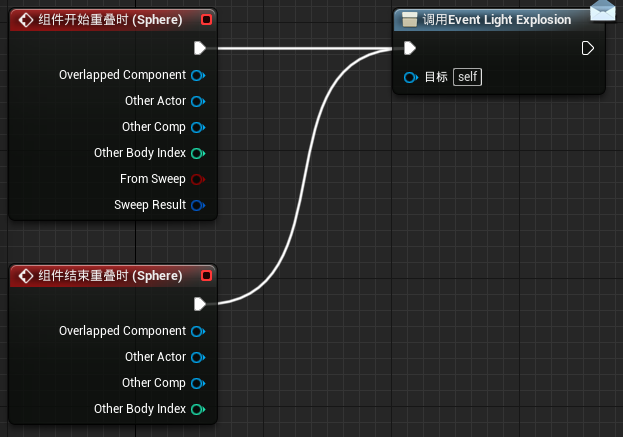
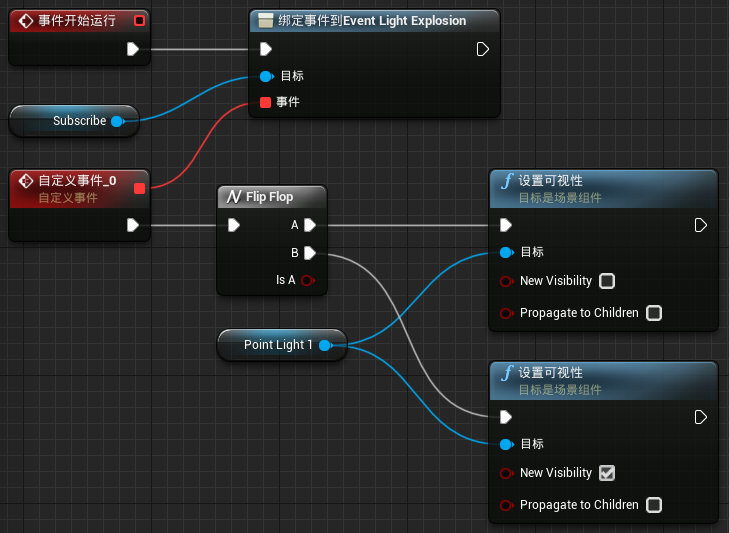
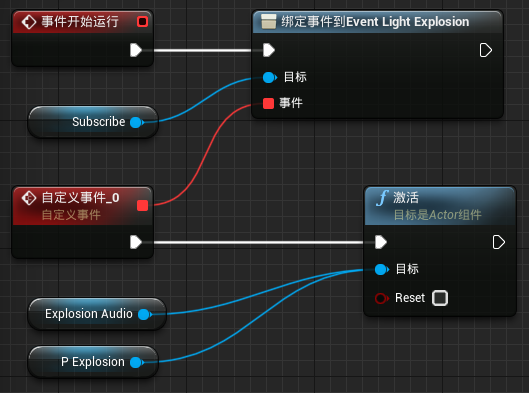
I create the first actor including a box collision and a delegate.

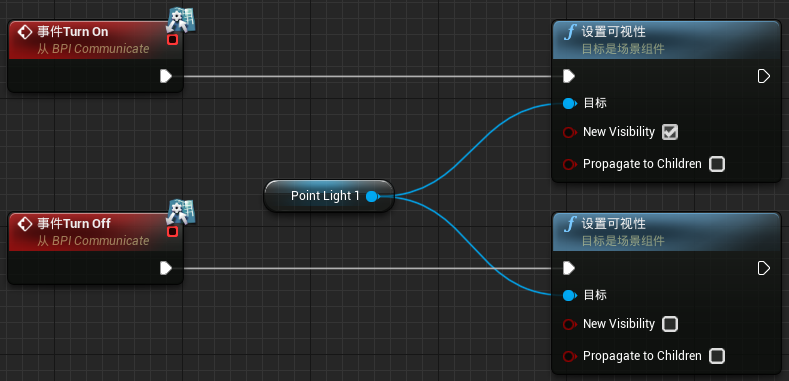
The second actor bind the delegate.

When player overlap with the first box collision, delegate is active, and the second actor log a message.

1
2
3
4
5
6
7
8
//first actor
DECLARE_DELEGATE(FCustomDelegate);
class ATriggerActor
{
class UBoxComponent* BoxComp;
virtual void NotifyActorBeginOverlap(AActor* OtherActor){ IntoTrigger.ExecuteIfBound(); }
FCustomDelegate IntoTrigger;
}
1
2
3
4
5
6
7
8
9
10
11
12
13
//second actor
class AReactActor
{
class ATriggerActor* TriggerActorReference;
void GetIntoTrigger(){ UE_LOG(LogTemp, Log, TEXT("get into the trigger")); }
}

void AReactActor::BeginPlay()
{
Super::BeginPlay();
TriggerActorReference->IntoTrigger.BindUObject(this, &AReactActor::GetIntoTrigger);

}

As for why using BindUObject to bind a function to the delegate.

1
2
3
4
5
6
7
8
9
10
11
12
13
//DelegateSignatureImpl.inl
class TDelegate
{
//function that creates kinds of delegate UE_NODISCARD
//constructor, destructor, and operator override

//function that binds a delegate
template <typename UserClass, typename... VarTypes>
inline void BindUObject(const UserClass* InUserObject, typename TMemFunPtrType<true, UserClass, RetValType (ParamTypes..., VarTypes...)>::Type InFunc, VarTypes... Vars)
{
*this = CreateUObject(InUserObject, InFunc, Vars...);
}
}

I try to replace BindUObject to CreateUObject , due to the UE_NODISCARD which build errors.

nodiscard is an attribute from cpp17 which seems to far for me……sad

This is a note for the video from Unreal Engine Youtube Channel called Being an Unreal Engine Programmer | Unreal Educator Livestream , which is almost 2 hours and sadly it is the only one video talks about programmer in recently years.

[09] あいさつ

Mr. Kyle Langley

[24] get source code from github, build solution by visual studio

[31] install engine from epic, recommend install the “editor symbols for debugging”

[34] create a blank project from visual studio

[42] for unreal developers dont need to know about like garbage collecting or other computer science

[44] using “visual assist” to help coding easier

[47] blueprint is a good start for use unreal without computer science education

Mr. Jeff Farris

[55] epic teams develop engine and game at same time to make products better with many other game developers

[1:04] as an engine developer, the customer is other developer

[1:06] unreal is separated into many parts, even fortnight didnt use light baking. so unreal is used broadly like umbrella

[1:13] audio is also important in game development. “be a T shape person”

[1:16] generalist is awesome and helpful is a team with quickly respond

Mr. David Hill

[1:24] how to define a game engine, including lots of tools used for different function.

[1:29] what is a tool in unreal

[1:32] an example about tools change LOD to reduce the triangle

[1:44] dont be afraid of make mistakes, the industry is changing

QA

[1:47] why use so many c++ code. seems that Rust is going to be popular

Also thanks Mr. Mark Flanagan.

Abstract

Finally, built unreal engine source code successfully. First time clone source code from github was the main branch which is UE5, but I haven’t installed vs2022 yet, so the build tool cant generate vs sln file. Error message point out that the version of MSVC is less than 14.2. Anyway, I decide to turn to clone the UE 4.27 which is the most recent version before UE5. And I found a website to learn the operation about git. It explain the branch setting in local repository and how deal with the commit conflict when operating an open-source project with other developers. I have learned for hours, made a temp repository, but the command I really need below is from google, haha.

1
git clone -b 4.27 https//....

So in this part I want to record unreal source code which I found. As we know, the inheritance relationship in the whole is complex. It seems impossible to draw a graph or make a data table to show the inheritance. Fully understanding the engine seems to take a very long long time.
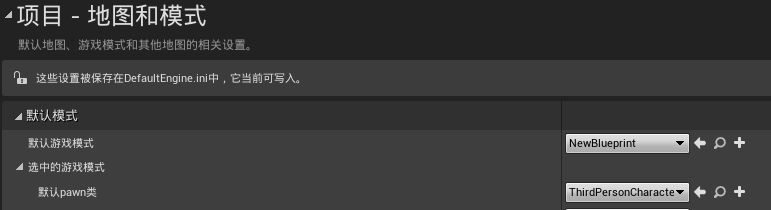
  1. GameModeBase

    When create an empty cpp project, the default mode is GameModeBase. As game play, we can control a camera move, so I guess the camera is generated by default. First, as DefaultPawnClass is declared as a TSubclassOf<APawn> type, and is defined = ADefaultPawn::StaticClass() .

    The class ADefaultPawn is inheritance from class Pawn . According to the doc,

    DefaultPawns are simple pawns that can fly around the world.

    It’s right, the flying camera. Let’s see the cpp source code.

    1
    2
    3
    4
    5
    6
    7
    8
    9
    10
    11
    12
    //DefaultPawn.cpp
    ADefaultPawn::ADefaultPawn(const FObjectInitializer& ObjectInitializer): Super(ObjectInitializer){
    //construct function initalize the collision component,movement component
    //choose a spheremesh as the default subobject
    }
    void InitializeDefaultPawnInputBindings(){
    //initialize move forward, right,up, turn and lookup
    }
    void ADefaultPawn::SetupPlayerInputComponent(UInputComponent* PlayerInputComponent){
    //bind axis
    }
    void ADefaultPawn::MoveRight(float Val){} //same as move forward, move up and so on

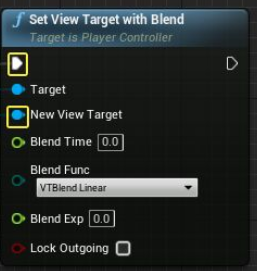
    But there’s nothing to do with camera. Of course, camera is auto setup in the class PlayerController .

    It’s going to be the topics in the future!

Abstract

The reason why I made this title is inspired from a video about the dark side in the self-study by a math youtuber. And also this is my first time to write blog in English. Of course I have been writing and reading articles in university, but they are shit and I don’t care what they are saying. Back to the Title, I found that I have been learning unreal engine and cpp for over 2 months, and I still can’t make my own game demo. Maybe I didn’t work hard or I realize that I get the wrong direction from that video, sorry I forgot the youtuber name. The topic of that video is that self-study is actually a difficult thing for every person, and that’s why there are so many colleges in the world, right?

CPP相关

Blueprint with C++

C++

vector source code

1
2
3
4
5
6
7
8
9
10
11
12
13
14
15
16
17
18
19
20
21
22
23
24
25
26
27
28
29
30
31
32
33
34
35
36
//MSVC\14.29\include\vector
namespace std
{
// CLASS TEMPLATE _Vector_const_iterator
template<class _Myvec>
class _Vector_const_iterator
{//这里面写了很多迭代器操作符的重载};

// CLASS TEMPLATE _Vector_iterator
template <class _Myvec>
class _Vector_iterator : public _Vector_const_iterator<_Myvec>{};

// CLASS TEMPLATE _Vector_val
template <class _Val_types>
class _Vector_val{};

// CLASS TEMPLATE vector
template <class _Ty, class _Alloc = allocator<_Ty>>
class vector
{
//构造函数
//成员函数 push_back,insert,assign,resize...
};

template <class _Ret>
struct _Vbase_compare_three_way{};


// CLASS TEMPLATE _Vb_val
template <class _Alloc>
class _Vb_val{};

// CLASS vector<bool>
template <class _Alloc> : public _Vb_val<_Alloc>
class vector<bool, _Alloc>{};
}

插入图片测试

我的第一个游戏开发日志

2022/04/04

制作第一个关卡:一个房间,包括一个落地窗,床,桌子,卫生间,门,如果可以的话加上一个窗帘

首先复习一下LightingShadow这个快速指南。然后用BSP Brash绘制房间的边界,再加入家具(需要参考油管bsp to mesh的视频)

2022/04/06

重新建了一个level1,这次直接用mesh来搭房子,门框和窗户框是通过BSP brush来做的,因为需要剔除门的空间。然后把brush生成mesh,再添加材质。

测试遇到的问题

  1. 从brush生成的mesh不受光照影响,也就是说材质没有被反射,玩家视角看到的是黑色的。

    需要做的改动如图,光照贴图分辨率参考其他的墙mesh设置为128,光照贴图坐标索引设为1。

  2. 当前的mesh默认是没有碰撞的,也就是说玩家会穿墙,对于窗户框来说,添加盒体简化碰撞(当前不希望玩家能穿过窗户),而对于门框来说,可以通过添加凸包碰撞来自动设置,但是精度有限。

    通过添加盒体碰撞然后自定义范围来规划碰撞体积。效果如图

2022/04/07

今天想做游戏的开头,玩家躺在床上的视角,遇到了问题。

先把玩家放在床上

然后简化了床的碰撞盒

但是游戏运行的时候,玩家无法躺在床上

但是如果勾选胶囊物理效果就可以躺下

或者把胶囊碰撞体缩小

还有一种我觉得比较好的解决方法是把默认的胶囊缩小,然后再新建一个和人等大的胶囊

之所以要重新添加一个胶囊是因为我怀疑原来的胶囊碰撞体根本无法旋转

还有一个原因我觉得是本身这个场景就不应该用character而是应该用pawn

今天还看了官方的第三人称教程 到12P,还有几个设置没太搞懂,先截图记录下来。均取自character蓝图类。

  1. 类默认设置–Pawn–使用控制器旋转Yaw

  2. 移动组件–角色移动(旋转设置)–使用控制器所需的旋转/将旋转朝向运动

2022/04/08

明天计划先把第三方教程过一遍,然后找mixamo导入unreal和动画相关的教程,第一场景新建一个pawn类来做。

第三人称游戏的教程没有过完,mixamo导入unreal实现了,但还有缺陷。今天没有做实际的游戏开发。

2022/04/09

计划看官方骨骼的视频,然后学习蒙皮权重相关的知识。

2022/04/10

2022/04/11

游戏内摄像机的切换方法

案例参考官方文档 ,思路类似actor之间的通信,把Character蓝图的PlayerController组件里的的相机做替换。

2022/04/12

限制摄像机转动角度的方法,关键词 camera rotation limit

油管教程就不贴了,后来看到了一个比较简单的方法

虽然不清楚对后续开发是否有影响,反正目前想要达成的目的算是实现了。没想到还有这么简单的方法。

dialog


开发过程中的一些技术总结

关于玩家摄像机镜头的调整

  • UE4的第一人称模板中,player是由手臂和枪组成的,与相机绑定。

在相机的细节中勾选使用Pawn控制旋转

FirstPersonCamera001 FirstPersonCamera002

这种相机设置的效果就是相机始终和枪口在一个方向。

但是像吃鸡这样的第一人称游戏中,低头会看到玩家自己的躯干。

为了实现这样的效果,可以修改第三人称模板来实现。

方法参考油管视频

  • 在第三人称的模板中把相机挂在弹簧臂下面,弹簧臂像自拍杆一样与actor保持固定距离。

同样在相机的细节中勾选了使用Pawn控制旋转

相机的修改如下:删除弹簧臂,然后把相机挂载在mesh下面。在插槽中选择head,然后调整相机的transform。可以修改FOV,把相机下移到胸口附近,这样可以在低头时看到手。

然后在相机的设置中勾选使用Pawn控制旋转,勾选后表示可以通过鼠标来旋转相机,但是会出现旋转过头的现象,玩家的头是无法旋转360度的。

造成这种问题的原因可以理解为相机在旋转的时候,玩家并没有旋转,如果玩家可以跟着旋转的话,相机的角度就不会过大了。

在最上一层的actor设置中勾选使用控制器旋转Yaw

最后游戏中低头的效果,目前稍微有点穿模。


坐标系相关的总结

直接说结论,坐标系的方向遵循笛卡尔左手坐标系。

首先这是UE4空白项目的世界坐标系

在维基百科中,笛卡尔坐标系分为左手和右手两种

由图可知UE4是遵循左手坐标系,而XYZ的顺序也是按照自然法则的顺序来命名的。

最后是关于旋转的定义,三个轴的旋转对应飞机的航偏轴,直接上图

唯一需要记忆的是XYZ对应的旋转顺序是Roll Pitch Yaw

X Y Z
R G B
大拇指 食指 中指
Roll Pitch Yaw

关于蓝图的迁移

记录蓝图迁移的方法是因为考虑到以后会经常性的把其他项目的蓝图整合到自己的游戏里面。如果能够顺利迁移的话可以提高开发的效率。

这次迁移的案例是把第三人称模板里的角色蓝图迁移到一个新的空白项目中。

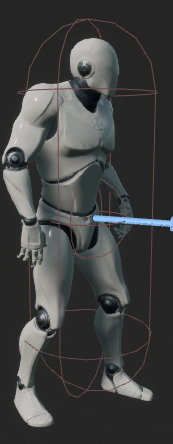
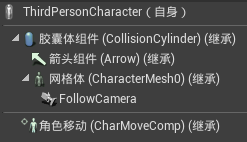
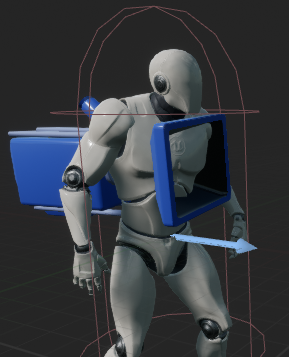
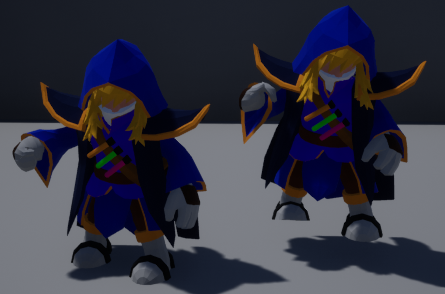
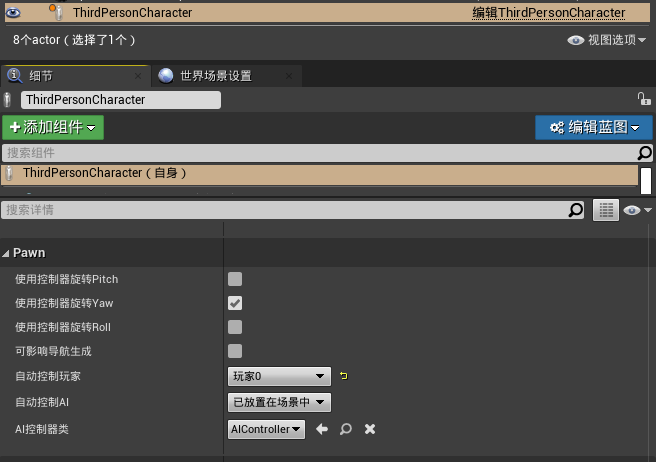
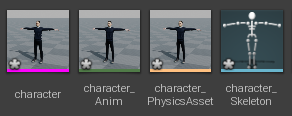
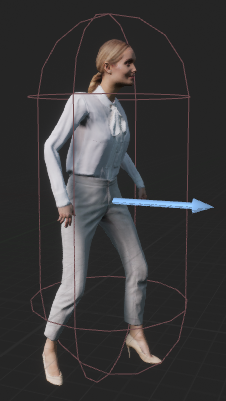
这个蓝图的父类是character,蓝图中使用了UE自带的mesh人物,绑定了默认的动画,定义了基本的移动。

从迁移的内容中可以看到相互绑定的关系。(所以在资源迁移的时候并不是单单的把这一个蓝图文件拷贝过去)

可以看到实际迁移的资产包括动画,材质,纹理,男女两个mesh,和最开始介绍的蓝图 (如果迁移的是同名游戏模式,则蓝图的最下面还包括了游戏模式蓝图)

把这些内容迁移到一个新建的空白项目中,需要迁移到content/ 的目录下

把蓝图拖到游戏场景中发现并不能像第三人称模板一样运行,接下来设置其他的地方

  • 将拖入场景的ThirdPersonCharacter的pawn改成玩家0,这样游戏开始时默认的视角就不是player start了

  • 新建一个game mode,把默认pawn改成ThirdPersonCharacter

  • 在项目设置–地图和模式–默认游戏模式 改为刚才新建的名字

  • 在项目设置–引擎–输入 中导入第三人称模板的配置文件

回到游戏中可以发现角色被完整的移植了过来


Actor通信的方法

**通过蓝图实现Actor通信的方法,参考自 官方文档 **

Actor之间的通信可以理解为玩家按下按键让灯亮或者是玩家靠近一个门,门自动打开。

  1. 直接通信

    在玩家蓝图中新建一个公开变量,变量类型是灯的蓝图类,通过直接访问灯的组件来控制的亮灭

    这种方法最后需要在游戏场景中的玩家设置中指定lamp reference是谁,这里指定的是一个实例。

  2. 类型转换

    用cast to来判断是否是目标actor,这个案例中玩家靠近灯后灯会灭,远离后灯会亮。

    给玩家添加一个球形碰撞检测,分别在重叠和离开的时候设置灯的亮灭。

    图中的两个事件是右键Sphere选择的,这种方法相比第一种不需要特殊指定,也就是说在地图里放很多Blueprint Ceiling Light都可以与之互动。

  3. 接口

    这个案例中,玩家靠近灯时灯灭,远离时灯亮。通过接口实现的好处就是接口可以重用,其他的类也可以使用接口,只不过实现的具体方法不同。

    首先新建一个蓝图接口,在接口中定义Turn On和Turn Off两个函数。

    玩家与actor重叠时调用接口。

    在灯的蓝图中先勾选实现接口

    然后实现接口中的函数

  4. 事件分发器

    在这个案例中,玩家每当靠近或远离灯时,不仅会让灯亮灭,还会让触发一个爆炸特效。

    事件分发可以理解为视频网站更新视频,即

    1. 创建一个视频频道
    2. 有观众订阅这个频道
    3. 这个频道发布新视频
    4. 订阅了这个频道的观众会受到新视频的通知

    为了方便把玩家当作是视频频道,而玩家每次与灯触发的事件视作发布一个新的视频,即第一步和第三步

    灯和爆炸特效为了订阅这个频道需要创建一个玩家类的公开变量,这里就叫做Subscribe。对应第二步和第四步。

    通过C++实现Actor通信

    1. 直接通信

    玩家按F键 灯亮

    创建Actor类来定义灯,头文件中添加场景组件,点光源组件,静态网格组件,实现灯开关的自定义函数和一些数据成员,然后再构造函数中对这些成员进行定义。—-自此完成了对CeilingLight类的定义

    1
    2
    //CeilingLight.cpp
    void ACeilingLight::TurnOffLight() {...} //开关函数

    基于这个C++类创建蓝图类,给蓝图类添加mesh素材。然后把蓝图类拖到场景中实例化,完成了从类到对象的过程。

    进入玩家类的头文件

    1
    2
    3
    4
    5
    6
    //Character.h
    //有什么办法可以按键后让场景中的所有灯都亮灭??
    protected:
    UPROPERTY(EditInstanceOnly, BlueprintReadWrite)
    class ACeilingLight* CeilingLightToToggle; //继承类
    void ToggleCeilingLight(); //开关函数

    定义成员函数

    1
    2
    3
    4
    5
    6
    7
    8
    //Character.cpp
    void ACharacter::ToggleCeilingLight()
    {
    if (CeilingLightToToggle)
    {
    CeilingLightToToggle->TurnOffLight(); //通过指向对象的指针来调用函数
    }
    }

    定义交互方式

    1
    2
    3
    4
    5
    6
    //Character.cpp
    ACharacter::SetupPlayerInputComponent(class UInputComponent* PlayerInputComponent)
    {
    ...
    PlayerInputComponent->BindAction("Use", IE_Pressed, this, &ACharacter::ToggleCeilingLight); //当按键时调用开关函数
    }

    目前已经在玩家的类中继承了一个灯的类,如果想通过按键实现让灯亮灭还要指定这个灯(对象)是谁

    1. 类型转换

    玩家靠近时灯亮,远离时灯灭

    灯的设置不变

    玩家类中添加用于碰撞检测的球和碰撞事件

    1
    2
    3
    4
    5
    //Character.h 这次不需要继承ceilinglighting类了
    protected:
    virtual void NotifyActorBeginOverlap(AActor* OtherActor);
    virtual void NotifyActorEndOverlap(AActor* OtherActor);
    class USphereComponent* SphereComp; //球体组件

    实现成员函数

    1
    2
    3
    4
    5
    6
    7
    8
    9
    10
    11
    12
    13
    14
    15
    16
    //Character.cpp
    //如果类型转换成功,则直接调用成员函数
    void ACharacter::NotifyActorBeginOverlap(AActor* OtherActor)
    {
    if (ACeilingLight* ActorCheck = Cast<ACeilingLight>(OtherActor))
    {
    ActorCheck->TurnOffLight();
    }
    }
    void ACharacter::NotifyActorEndOverlap(AActor* OtherActor)
    {
    if (ACeilingLight* ActorCheck = Cast<ACeilingLight>(OtherActor))
    {
    ActorCheck->TurnOffLight();
    }
    }

    可以看到这个案例中,类型转换比直接通信相比,首先玩家类不需要去继承灯的类了,因此也不需要去指定游戏场景中的灯对象。其次是可以在游戏场景中放置多个灯,都可以触发亮灭的逻辑。

    1. 接口

    初始化接口

    1
    2
    3
    4
    //InteractInterface.h
    public:
    UFUNCTION()
    virtual void OnInteract() = 0; //纯虚函数

    在灯的头文件中声明接口

    1
    2
    3
    4
    5
    6
    7
    //CeilingLight.h
    UCLASS()
    class ProjectName_API ACeilingLight : public AActor, public IInteractInterface //多重继承
    {
    public:
    virtual void OnInteract();
    }

    实现接口

    1
    2
    3
    4
    5
    //CeilingLight.cpp
    void ACeilingLight::OnInteract()
    {
    TurnOffLight(); //这个函数跟之前介绍的一样
    }

    在玩家类中调用接口

    1
    2
    3
    4
    5
    6
    7
    8
    9
    10
    11
    12
    13
    14
    15
    16
    //Character.cpp
    //如果碰撞体实现了接口,那么调用它的接口的函数
    void ACharacter::NotifyActorBeginOverlap(AActor* OtherActor)
    {
    if (IInteractInterface* ActorCheck = Cast<IInteractInterface>(OtherActor))
    {
    ActorCheck->OnInteract();
    }
    }
    void ACharacter::NotifyActorEndOverlap(AActor* OtherActor)
    {
    if (IInteractInterface* ActorCheck = Cast<IInteractInterface>(OtherActor))
    {
    ActorCheck->OnInteract();
    }
    }
    1. 事件分发器 (运行游戏时会崩溃,编译没有问题)

    假如玩家触发了A事件,那么绑定过A事件的actor会调用自己的函数。可以把A事件独立出来作为一个actor类,因此玩家不需要主动进行碰撞检测。

    玩家类还原为默认,不需要做修改。

    创建一个盒体类用于声明委托

    1
    2
    3
    4
    5
    6
    7
    8
    9
    //EventActor.h
    DECLARE_DELEGATE(FOnBossDiedDelegate);
    ...
    UPROPERTY(EditInstanceOnly, BlueprintReadWrite)
    class UBoxComponent* BoxComp; //盒体组件
    virtual void NotifyActorBeginOverlap(AActor* OtherActor); //用于碰撞检测
    FOnBossDiedDelegate OnBossDied; //这种写法好像类和对象
    UFUNCTION()
    void HandleBossDiedEvent(); //
    1
    2
    3
    4
    5
    6
    7
    8
    9
    10
    //EventActor.cpp
    void AEventActor::NotifyActorBeginOverlap(AActor* OtherActor)
    {
    HandleBossDiedEvent(); //当有actor碰到盒体时,调用事件
    }
    void AEventActor::HandleBossDiedEvent()
    {
    OnBossDied.ExecuteIfBound(); //这个事件激活了委托,那么绑定了OnBossDied的类都会有所反应!
    }

    灯的类中添加对委托的引用

    1
    2
    3
    //CeilingLight.h
    UPROPERTY(EditInstanceOnly, BlueprintReadWrite)
    class AEventActor* EventActorReference;
    1
    2
    //CeilingLight.cpp 这句话会造成程序崩溃
    EventActorReference->OnBossDied.BindUObject(this, &ACeilingLight::TurnOffLight); //灯的开关函数绑定OnBossDied

    在关卡蓝图种实现actor通信

    1. 案例:玩家靠近碰撞盒后灯亮


制作UE插件的方法


使用BSP Brush的心得

首先关于Brush是干什么的?

上图是从BSP生成的mesh,从左到右依次是默认的cube,将笔刷的长度缩小一倍,将Transform缩小一倍而生成的,但是在引用相同的材质时可以看到,通过Transform缩小一倍的mesh材质也被压缩了。

而把mesh做替换后,生成的大小是一样的。也就是说mesh是不受影响的。

由此可以联想到在做建筑物的建模时,

如果首先通过放大笔刷来构图(全部基于1立方的cube),那么接下来在同位置替换mesh的时候与构图定义的尺寸没有直接关系

如果想直接使用BSP的话,例如地板,只给一面上材质:

所以理想的工作流程应该是先用BSP做基础建模,但是定好了模型的尺寸,然后在根据限定的尺寸去做具体的模型


动画系统学习笔记

2022/04/08 直接学习过动画混合和序列相关的知识,后来发现好像动画系统是一个很大的分支。所以准备先过一下,如果有可以上手的案例顺便做一做。

主要看的是 骨架网格体动画系统

角色设置 的流程是

  1. 找到合适的骨架网格体和对应的动画
  2. 导入FBX模型,如果不匹配现有的骨骼,则生成一个新的骨骼。
  3. 创建玩家控制器脚本或蓝图来处理来自玩家的输入
  4. 为角色或Pawn创建一个蓝图或脚本或蓝图来解析输入并控制角色的实际移动(不是骨架动画)
  5. 为角色构造动画蓝图
  6. 创建一个使用自定义玩家控制器和任何其他自定义脚本资产的游戏模式脚本或蓝图

Mixamo上的资源如何用到UE4里面

Mixamo上主要有两种资源,character和animation

目标是让Mixamo上的character能替换到第三人称模板的小白人上去,然后给他添加动画(这个动画最好是能兼容Mixamo上的动画和EPIC商城的动画)

  1. 直接把character (FBX)导入UE项目中,如果在导入选项中指定UE默认的骨骼,后面可能会有问题,如果不指定的话会自己生成一个新的骨骼。FBX会被拆分,主要是图中的四大项

    这样虽然可以成功导入,但是如果想继续给添加动画的话,感觉无法和UE默认的资源兼容,因此还需要继续从Mixamo上下载相匹配的动画。我觉得这样有可能会无法和虚幻商城的动画包相匹配。

  2. 直接把animation导入UE项目中,这样做的初衷是想给UE添加新的动画,我在网上发现了一个转换工具 Mixamo Converter ,这个软件的原理是预先准备了一个能和Mixamo上的character相匹配的UE模型,然后传上去,再下载想要的animation,然后把animation在软件中转化一下就可以顺利导入到UE中,导入后的动画用的是还是原来小白人的骨骼和mesh。

    这种方法适合给小白人添加新的动画

  3. 利用 骨骼重定向 的方法,可以实现1:把新的角色和动画导入 2:把新的动画匹配到UE的小人上。

    重定向的具体设置:

    导入后角色的头发不能正常显示,修改材质

总结一下目前用到的几个角色资源包

  1. AnimStarterPack 官方的动画包

​ 导入后包括动画和mesh和骨骼,mesh和骨骼跟默认的小白人一样,但是如果想把动画添加到第三人称模板上,不能直接引用,可以通过先导出FBX再导入,导入的时候绑定到第三人称模板的骨骼上就可以使用了。

  1. Scanned3DPeoplePack 商店免费资源

    实际能操控的mesh有6个,骨骼跟小白人一样,但是想把现成的mesh替换掉模板的小白人实现小白人的移动动画是不行的,因为绑定的骨骼路径不同。因此需要更改绑定。

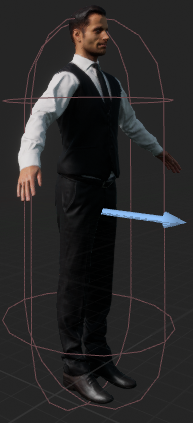
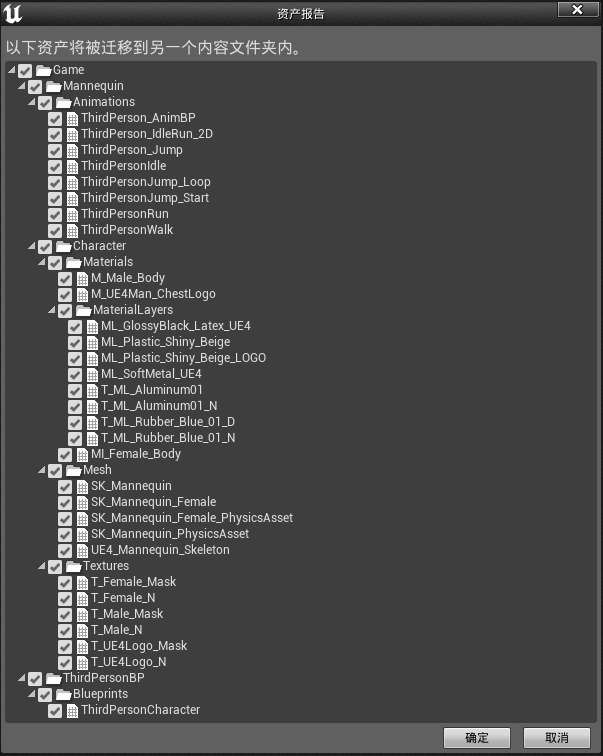
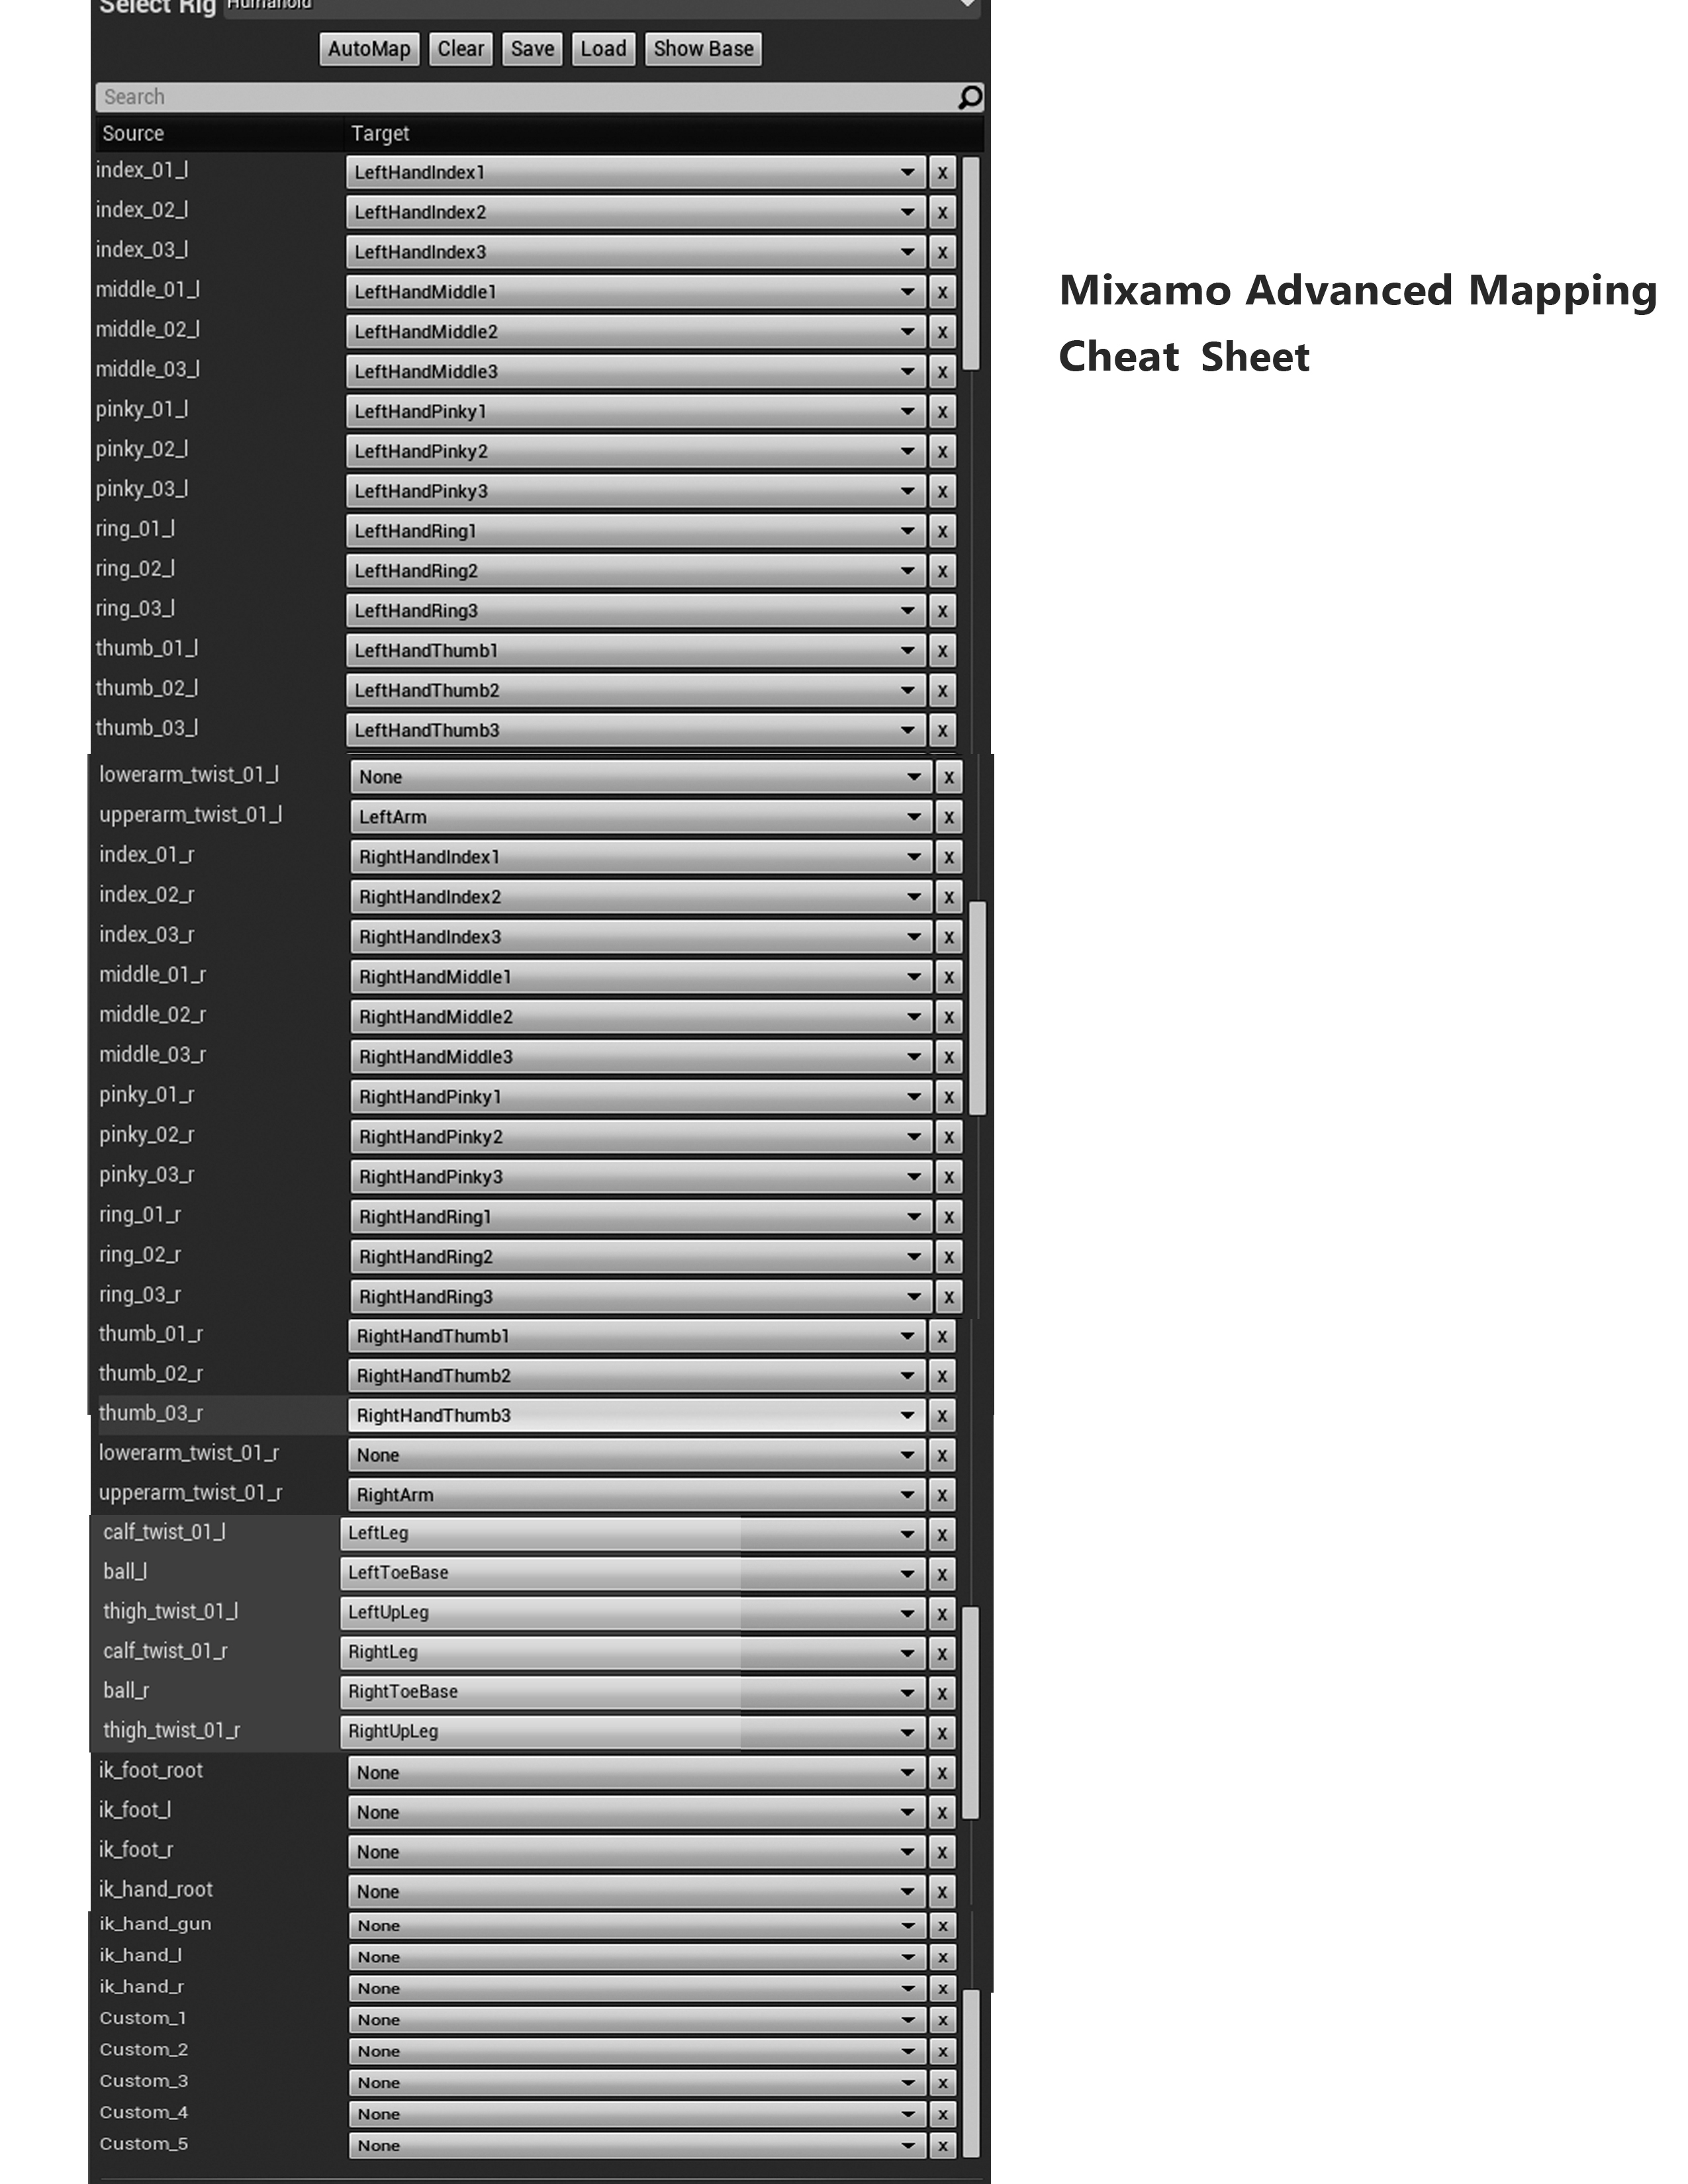
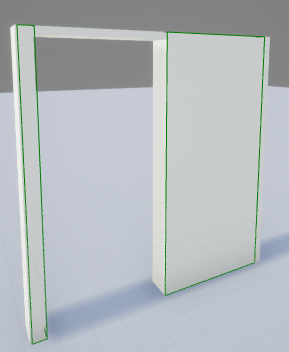
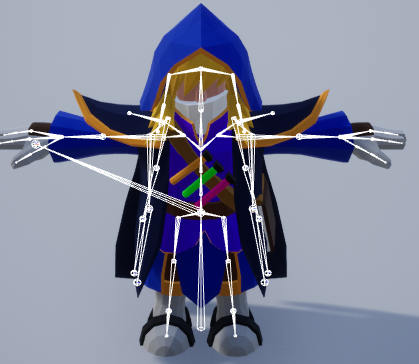
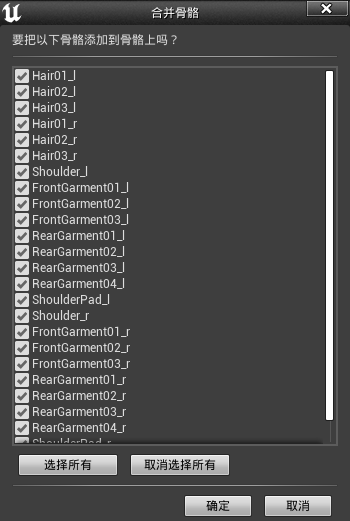
    以这个mesh为例,右键,骨骼–指定骨骼,然后选择模板的骨骼
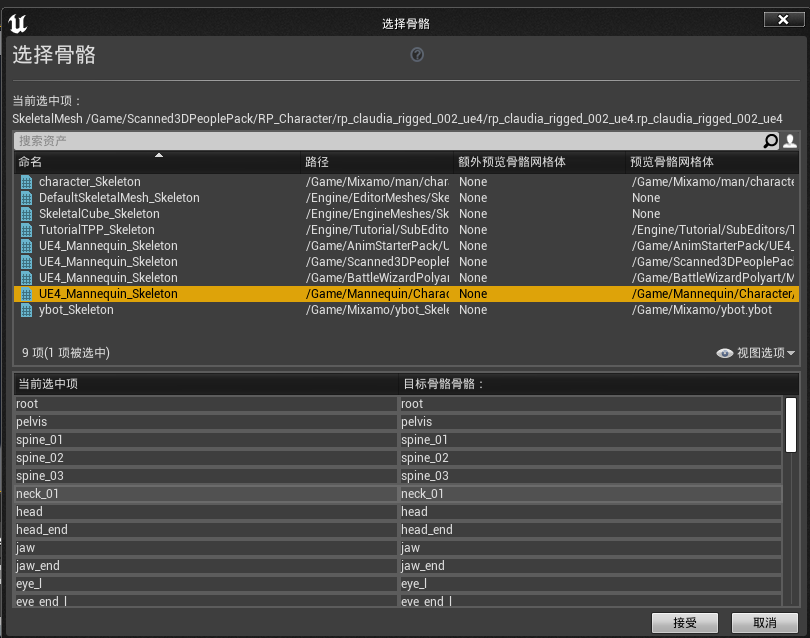
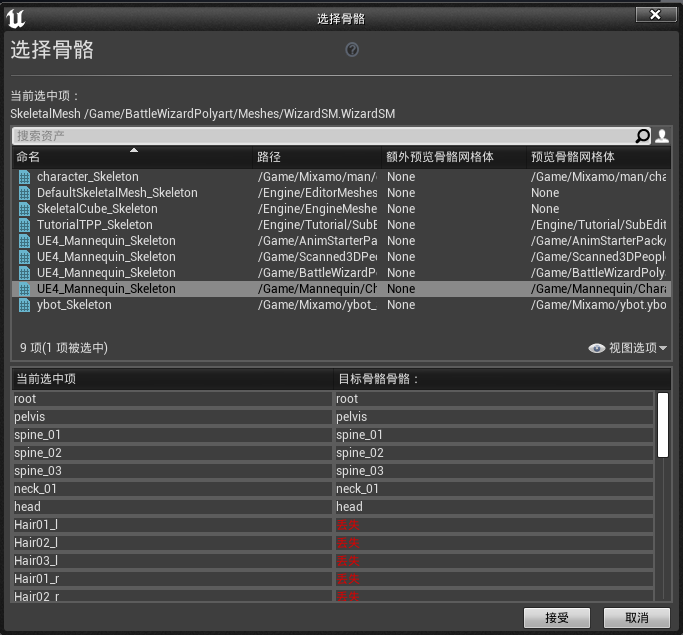
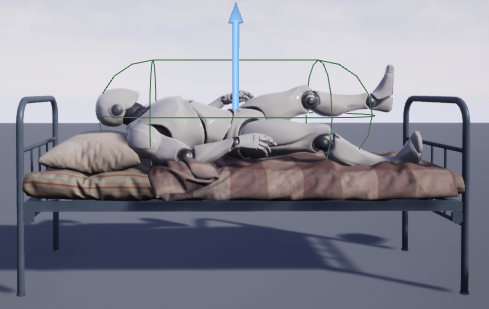
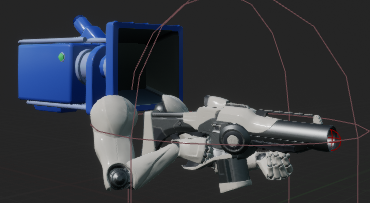
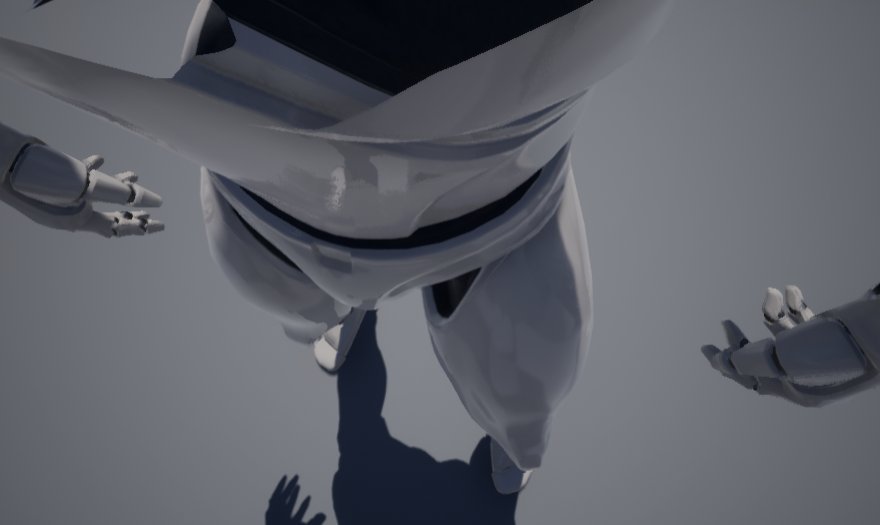
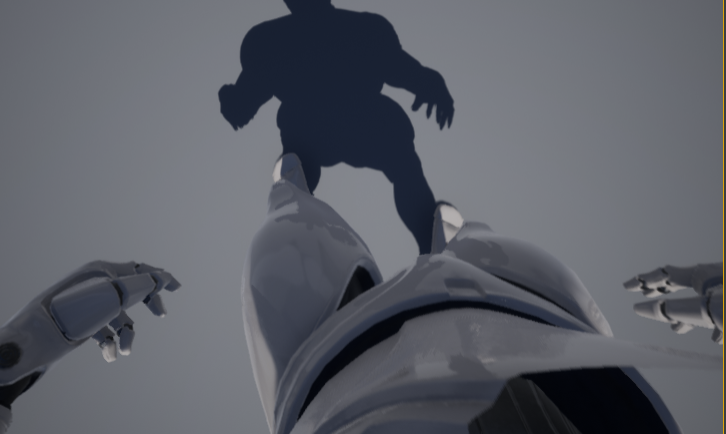
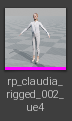
    可以看到正因为mesh的骨骼是一样的,所以可以直接替换绑定

    来到ThirdPersonCharacter蓝图,替换mesh

    可以看到替换完的mesh还可以使用模板的动画,算是完美兼容。而没有绑定新骨骼的男性mesh只能显示出T型模型,并不会使用动画。

  2. BattleWizardPolyart 商城免费资源

    骨骼与默认的小白人相比有拓展。

    如果想把套在小白人上,方法同2,但是需要注意

    然后如果还想把小魔法师的动画也移植过去,可以先做骨骼重定向,

    例如 从缩略图可以看到腿部是 有问题的

    实际在游戏中的表现,右腿出现了偏移。

    这里的解决方法应该需要用到 动画重定位 (为了把动画重定位,其实修改的是骨骼树)

    在这个例子中我主要修改了

    这里其实是把第三人称模板的默认骨骼设置修改了

    实际游戏中比之前下降了一点,但不够完美

    这部分的讲解视频可以参考官方油管

  3. Mixamo 重头戏来了

    首先要明确Mixamo上的骨骼和Mannequin是不一样的,也就是说不能像之前的三个例子一样直接把模型移植过去。

    这个时候需要用到 骨骼重定向

    重定向设置完后可以对动画进行双向导入。也就是说前面三个案例中的动画,可以通过 重定向动画资产 生成新的拷贝给Mixamo模型去用,或者是把Mixamo上的各种动画拿给能兼容Mannequin骨骼的模型去用(这就是之前介绍过的一个convert软件)

    关于骨骼重定向的讲解视频可以参考官方油管Smart Poly 的视频


对话系统

对话系统参考油管教程 目前先粗略梳理一下开发流程,后面会添加详细的说明

这个对话系统基于碰撞和按键交互触发。NPC与玩家发生碰撞后按F进入对话,鼠标选择对话选项。

各蓝图类中的Event Dispatchers情况总览

DialogComponent : 绑定 OnExit事件(DialogWidget)

DialogWidget :

OnExit分发事件, OnSpeakFinish分发事件, OnReplyFinish分发事件, OnMouseButtonDown(Override)

绑定OnClicked事件(DialogReplyObject)

Speak : 绑定OnSpeakFinish事件

Reply : 绑定OnReplyFinish事件

DialogEntry_BP : 实现接口UserObjectListEntry

DialogReplyObject : OnClicked分发事件

  1. 准备工作:

用于交互的接口类 Interaction,实现Interaction接口的组件DialogComponent,玩家添加球型碰撞器InteractionSphere

玩家与NPC碰撞时(将实现了Interaction接口的actor储存到数组中)/离开时(移除数组元素)

  1. ThirdPersonCharacter

当按下交互按键时,选择与玩家最近的NPC调用Interaction接口的函数OnInteraction()

  1. DialogComponent

响应接口的调用

Create Widget, Add to Viewport, Set Input Mode UI Only

  1. DialogComponent

运行BehaviorTree, Blackboard

  1. DialogTree

Key:DialogWidget(在DialogComponent中赋值), ReplyIndex

序列的第一个任务Speak,代表NPC要说的话

  1. Speak

执行任务

以text为参数调用Speak事件(DialogWidget)

  1. DialogWidget

显示SpeakBox隐藏ReplyBox

  1. DialogWidget

鼠标按下后从NPC的话切换到玩家的话(SPEAK任务结束,进入下一个REPLY任务)

函数OnMouseButtonDown

  1. Speak

由于Speak绑定了OnSpeakFinish事件, 结束任务,进入行为树序列的下一个任务

  1. Reply

任务开始执行

传递reply text参数调用Reply事件

  1. DialogWidget

Reply事件把数组元素构建为对象,存入reply的对话列表中

显示ReplyBox隐藏SpeakBox

  1. DialogEntry_BP

响应接口的调用,把行为树中的对话内容赋值给当前的widget

  1. DialogEntry_BP

reply被点击后,调用OnClicked事件(DialogReplyObject)

  1. DialogWidget

绑定了Onclicked事件,调用OnReplyFinished事件

  1. Reply

绑定了OnReplyFinish事件,任务结束,根据玩家选择的对话选项进入序列的下一个任务

  1. Exit

这里假设玩家对话选项选择完后,NPC再说一句话 然后触发结束任务

  1. DialogComponent

绑定了OnExit事件,Set Input Mode Game Only, Stop Logic (Behavior Tree), Remove widget from Parent

发现的问题:貌似教程里提到的一段节点没有用到?

DialogWidget


可能会用到的插件

  • Fade Objects:顾名思义是一个组件,可以改变第三人称游戏中相机和玩家之间的物体的材质实现透明的效果(本体是C++写的,但是感觉上比较简单,应该可以研究一下)

  • AGR:(好像是一个管理系统,没搞懂有什么用)

  • Async Loading Screen:应该是在读取下一个level时候用的过场动画插件

  • Cesium:(不知道是什么东西)

  • Directional & Planet Gravity:一个改变重力方向的插件

  • Easy Quests:任务系统,基于蓝图开发的组件(感觉可以研究一下)

  • GOAP NPC:可以给NPC添加AI逻辑?

  • Graph Formatter:一个理线的插件

  • Journeyman’s Minimap:小地图插件

  • Physical Layout Tool :可以给mesh附加物理效果(重力)

  • Prefabricator:把素材规划成一个prefab,然后随机的生成,可以实时生成

  • Procedural Building Generator:一个用于城市建模的蓝图,提供了一些选项方便快速建模(感觉有机会用到)

  • ProInstance Tools Plugin:同样是建模插件,特点是批量生成和管理

  • Root Motion Guide:(动画相关的插件,没搞懂,但是貌似教程很详细)

  • UI Navigation:一个做游戏菜单的框架(感觉后面会用到)

  • Weather System:国人做的,不知道会不会用到

  • Blockout Tools :提供一些现成的mesh(现在是收费的了)

  • SuperGrid Starter pack :这是一个工程文件,里面有提供现成的mesh,方便创建关卡的原型

插件下载后保存在engine/marketplace下面。可以看到部分源码?


开发中还未解决的问题

  • 按键弹出UI这样的key press event写到哪里比较好?玩家蓝图?关卡蓝图?还是在控件蓝图里写?

案例研究

ContentExample

Geometry

1.2 依次把1 2 3的盒体笔刷排序到最后一项

1.3 没懂有什么用

1.6 非常巧妙的建模(应该用了大量的sub盒体)

FBX

1.2 LOD细节层级,一个非常神奇的例子!(镜头拉远后会变更mesh的材质)

1.3 计算法线(Calculate Normals) 导入法线(Import Normals) 都是什么东西??

1.7 如何把cube变成骨骼体?再添加变形动画?

Navmesh

1.1 让AI通过导航跨过障碍物,利用simple move to location节点。(如果是pawn类的话貌似不能跨过障碍物,但是可以在导航点之间移动)

1.2 利用导航链接代理NavLinkProxy来实现翻越障碍物(自己做案例的时候不能100%成功)

1.3 (没懂和1.1的区别)

Math

1.2 利用time的sin的abs来作为材质(材质中用到了lerp函数,但是向量的算法没搞懂)

1.3 Frac函数的用法

1.4

2.9 让物体旋转朝向玩家的例子(复现成功)

2.14 向量点积 dot product 就是向量的乘积

2.17 (材质的案例,没看懂)

2.18 向量积(不知道有什么用)

2.20 (材质函数没搞懂)

Animation

1.3 (尝试做一个用鼠标拖动的滑块)(还没搞懂里面的函数,有没找到的变量名hovered)

(妈的动画部分东西好多)

Blueprints_Overview

1.4 通过构造函数为蓝图类添加组件(感觉没什么用)

1.5 通过构造函数创建动态材质(三个节点)

1.7

Blueprints_Advanced

1.1 在一个区域内随机生成静态网格体(复现成功)

1.2 (也是自动生成,但是没看懂)

1.3 (也是自动生成,但是感觉可以复现出来)

1.4 聚光灯的材质很有朦胧的感觉,说不定可以用来挡镜头

2.1 利用timeline改变球的位置和scale来实现弹球的效果

2.2 摄像机追踪人(跳过)

2.3 接口实现,踩下按钮,让其他物体旋转(复现成功)

2.4 开门关门(感觉可以复现

2.5 父子类蓝图(没看懂)玩家在吃道具的时候有一个吸附过程 (真牛啊)

Blueprint Communication

1.1 最简单的通过自定义事件触发开关灯,这里灯的亮灭经过了一个timeline。按钮在被按下时材质会发生变化

1.2 实际上是三个actor之间的通信,比较有新意的是,灯的亮度通过电池的容量调节。电池类中定义了与按钮的交互和电池的电量,灯类中定义了与电池的交互和亮灭的细节

1.3

1.4 按钮类通过Get all actors of class 来让一群灯亮,灯类通过set play rate实现随机timeline看起来不同灯有不同的闪烁

2.1 基本的事件分发器,但是通过关卡蓝图实现的中转

2.3 炸弹爆炸,要搞懂这个过程的状态转移

3.2 接口三个拉杆的案例

Blueprint_Input

有三个小游戏案例,首先实现了玩家控制器的切换功能 (虽然还没细看,但是感觉里面的游戏逻辑值得研究

Blueprint_HUD

这个吃道具的案例用到了很多功能性类,比如game mode,hud,level bp,controller bp

虽然貌似hud已经比较老了,但是有时间可以做一个框架梳理

Blueprint_Splines

1.3 不知道有什么用,通过splinemesh组件拉伸一个管道,但是不能像spline组件一样派生多个拐点 (向量的计算没看懂

2.2 动态添加spline,实现了随风摆动的灯笼(详细没看

2.3 树枝生长的动画,用到了很多和spline相关的节点

2.4 模拟鱼的运动(这个太牛逼了,感觉看会就能出师了

Physics

1.1 给mesh勾选movable和simulate physics来添加物理效果(玩家的抓取系统看起来很复杂 玩家蓝图中定义了一个grabb函数,和官方教程的案例有相似的地方,不过官方教程把抓取做成了一个组件)

1.2 给骨架mesh添加物理,实现了像人类一败涂地的效果

StaticMesh

1.3 为什么!!UV通道是什么东西

官方文档学习笔记

  1. 材质节点的说明

  2. 关于摄像机使用的例子

有CPP的实现方法,还没有看。其中切换摄像机视角用到了 SetViewTargetwithBlend 节点 (target is player controller)

Welcome to Hexo! This is your very first post. Check documentation for more info. If you get any problems when using Hexo, you can find the answer in troubleshooting or you can ask me on GitHub.

Quick Start

Create a new post

1
$ hexo new "My New Post"

More info: Writing

Run server

1
$ hexo server

More info: Server

Generate static files

1
$ hexo generate

More info: Generating

Deploy to remote sites

1
$ hexo deploy

More info: Deployment